


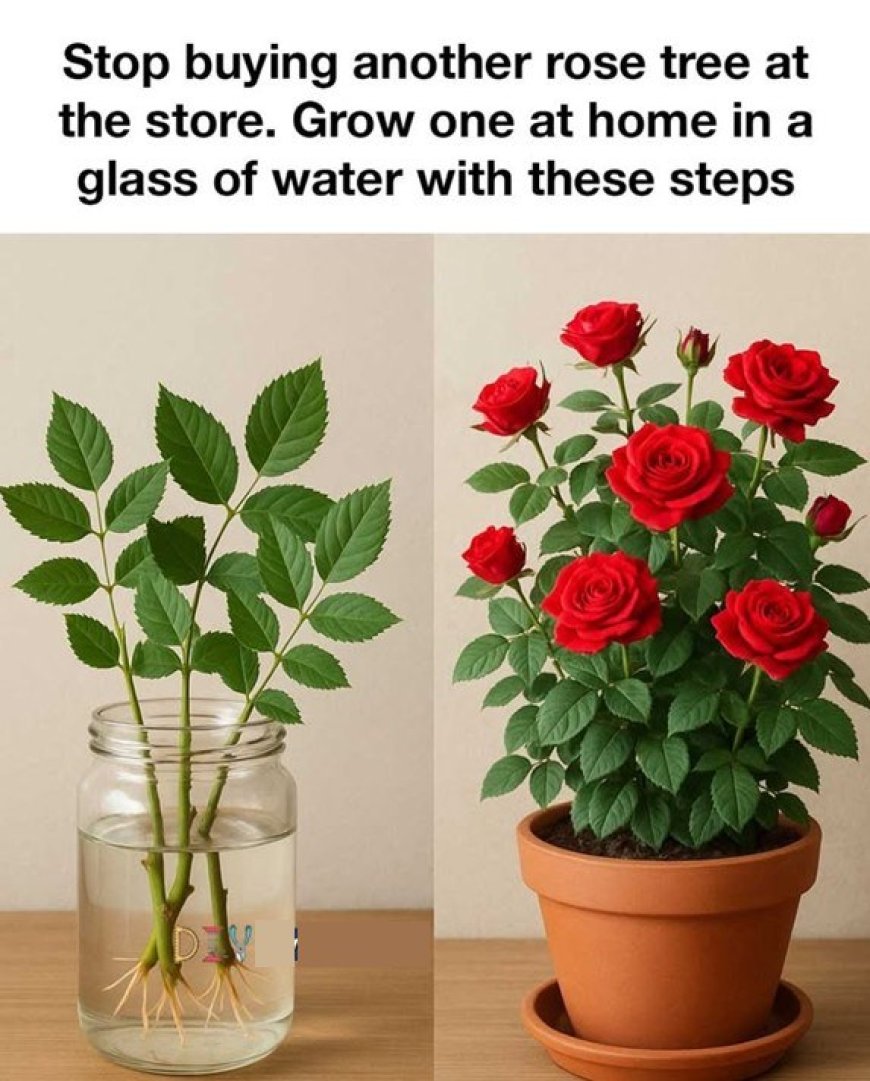
Stop Buying Roses! How to Grow a Rose Tree in a Glass of Water
Roses are often seen as the crown jewels of the garden—elegant, fragrant, and deeply symbolic—but buying new rose bushes can be costly, and even then, they don’t always adapt well to their new environment. What many gardeners don’t realize is that there’s a remarkably simple and highly effective way to grow your own roses at home without spending a fortune. By using just a single cutting and a glass of water, you can create a strong, thriving rose plant that’s genetically identical to the original.
1.
Stop Buying Roses! How to Grow a Rose Tree in a Glass of Water
Tired of buying expensive rose bushes that sometimes fail to thrive? There’s a simpler, more rewarding way. You can grow your very own rose tree from a single cutting using just a glass of water. It’s a cost-effective and fascinating process that lets you clone your favorite varieties right at home.
Here’s your simple, step-by-step guide to successful rose water propagation.
Step 1: Gather Your Supplies
You only need a few basic items to get started:
A Healthy Rose Cutting: The most important ingredient!
Sharp, Clean Pruning Shears or a Knife
A Clear Glass Jar or Vase
Fresh, Room-Temperature Water (filtered, rainwater, or distilled is best)
Rooting Hormone (Optional): Significantly boosts success
rates.
Step 2: Choose and Prepare the Perfect Cutting
This is the most critical step for success.
Select the Right Stem: Choose a healthy stem from a rose bush that has recently finished blooming. It should be about 6-8 inches long, about the thickness of a pencil, and have at least 3-4 leaf nodes (the bumps where leaves grow).
Make the Cuts:
Make a 45-degree angle cut just below a leaf node. This increases the surface area for root growth.
Make a straight cut at the top, just above a leaf node.
Prepare the Cutting:
Remove all leaves from the bottom half of the cutting.
Leave a few leaves at the top to support photosynthesis.
Remove any flowers or buds to direct all energy toward root development.
(Optional) Apply Rooting Hormone: Dip the wet, angled cut end into rooting hormone powder or gel. Tap off the excess. This step is highly recommended to stimulate faster, stronger root growth.
Step 3: Set Up Your Water Propagation StationFill the Jar: Use a clean, clear glass jar. Fill it with enough non-chlorinated water to submerge the bottom 2-3 inches of the cutting (covering at least 2-3 leaf nodes).
Place the Cutting: Put the prepared cutting in the jar. Ensure no leaves are underwater, as they will rot and spoil the water.
Find the Perfect Spot: Place the jar in a location with bright, INDIRECT sunlight. A north or east-facing windowsill is ideal. Avoid direct, hot sun, which can overheat the water and encourage algae.
Step 4: Maintenance & Monitoring
Change the Water: Refresh the water every 3-5 days to keep it oxygenated and prevent bacterial or fungal growth. Always use room-temperature water.
Be Patient: Rooting takes time! You should see small, white roots emerging from the nodes in 2 to 6 weeks.
Watch for Problems: If the water gets cloudy, change it immediately. If the stem looks slimy, gently rinse it off.
Step 5: Transplanting to Soil (The Final Step)
Once the roots are at least 2-3 inches long and look sturdy, your new rose plant is ready for soil.
Choose the Right Pot: Select a pot with good drainage holes and fill it with a well-draining potting mix.
Plant Gently: Make a small hole in the soil and carefully place the roots inside. Avoid bending or breaking them. Gently firm the soil around the stem.
Water Thoroughly: Water the plant well to help settle the soil around the roots.
Provide Tender Love and Care: Keep the soil consistently moist (but not soggy) for the first few weeks as the plant adjusts from water to soil. Continue to keep it in bright, Tap the p.hoto to v.iew the full r.ecipe.