


Don't buy cheese! Just add vinegar to milk and you get incredibly delicious homemade cheese
Many people think making cheese at home is complicated, expensive, or requires special equipment. In reality, some of the simplest and most delicious cheeses can be made in your own kitchen using only a few everyday ingredients. Long before modern factories and packaged dairy products, households around the world used traditional methods to transform fresh milk into soft, flavorful cheese in just a short amount of time.

1.
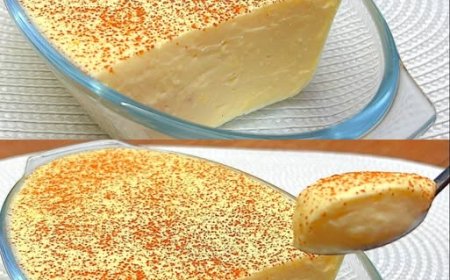
Don't buy cheese! Just add vinegar to milk and you get incredibly delicious homemade cheese!
Who knew making cheese could be so simple? If you're looking to save money or experiment with DIY food projects, creating homemade cheese using just milk and vinegar is a game-changer. This quick and easy method produces a fresh, tangy cheese that's perfect for snacking, cooking, or even gifting. Let’s dive into how this magical process works and why it’s worth trying at home!
Skip the Store-Bought Cheese! Make Your Own with Milk and Vinegar
Homemade cheese might sound intimidating, but with just two ingredients—milk and vinegar—you can whip up an incredibly delicious batch in under 30 minutes. Not only is it budget-friendly, but it’s also customizable and fun to make. Whether you’re a beginner cook or a seasoned pro, this recipe will impress anyone who tries it.
Let’s get started!
Why You Should Try Making Homemade Cheese
Cost-Effective : Save money by skipping store-bought cheese.
Customizable : Adjust the flavor and texture to suit your preferences.
No Special Equipment Needed : All you need is a pot, strainer, and some cheesecloth (or a clean kitchen towel).
Quick Results : Unlike aged cheeses, this one is ready to eat within minutes!
Great for Cooking : Use it as a substitute for ricotta, paneer, or crumbled feta in recipes.
Ingredients
1 liter (4 cups) whole milk (preferably non-homogenized for better results)
¼ cup white vinegar (or lemon juice for a milder flavor)
Optional: Salt, herbs, or spices for seasoning
Instructions
Step 1: Heat the Milk
Pour the milk into a medium-sized saucepan and place it over medium heat.
Stir occasionally to prevent scorching. Heat the milk until it reaches 185°F (85°C) . If you don’t have a thermometer, bring it to just below boiling—small bubbles should form around the edges of the pan.
Step 2: Add the Vinegar
Once the milk is hot, remove it from the heat.
Slowly pour in the vinegar while gently stirring the milk. Watch closely as curds begin to form almost immediately. The liquid (whey) will become clear, and the solid curds will separate.
Step 3: Strain the Curds
Line a colander with a piece of cheesecloth or a clean kitchen towel and place it over a bowl to catch the whey.
Carefully pour the mixture into the lined colander. Let it drain for about 10–15 minutes, depending on how firm you want your cheese to be.
HomeDon't buy cheese! Just add vinegar to milk and you get incredibly delicious homemade cheese!
Don't buy cheese! Just add vinegar to milk and you get incredibly delicious homemade cheese!
Step 4: Season and Shape
After draining, gather the edges of the cheesecloth and squeeze gently to remove any
excess whey.
Transfer the cheese to a bowl and mix in salt, herbs (like oregano or thyme), or spices (such as garlic powder or red pepper flakes) for added flavor.
Shape the cheese into a ball, log, or patty, or leave it loose for crumbling.
Tips for Success
Use Fresh Milk : For the best results, use high-quality, unpasteurized or minimally processed milk.
Experiment with Acids : While vinegar works well, try substituting it with lemon juice, lime juice, or even yogurt for different flavors.
Save the Whey : Don’t throw away the leftover whey! It’s great for smoothies, baking, or feeding plants.
Store Properly : Keep your homemade cheese refrigerated in an airtight container for up to 5 days.
How to Use Your Homemade Cheese
This versatile cheese can be used in countless ways:
Snack Time : Pair it with crackers, fruit, or honey for a tasty appetizer.
Cooking : Substitute it for ricotta in lasagna, stuffed shells, or pasta dishes.
Indian Cuisine : Use it as a paneer replacement in curries or stir-fries.
Salads : Crumble it over greens for a creamy, tangy addition.
Tap the p.hoto to v.iew the full r.ecipe.